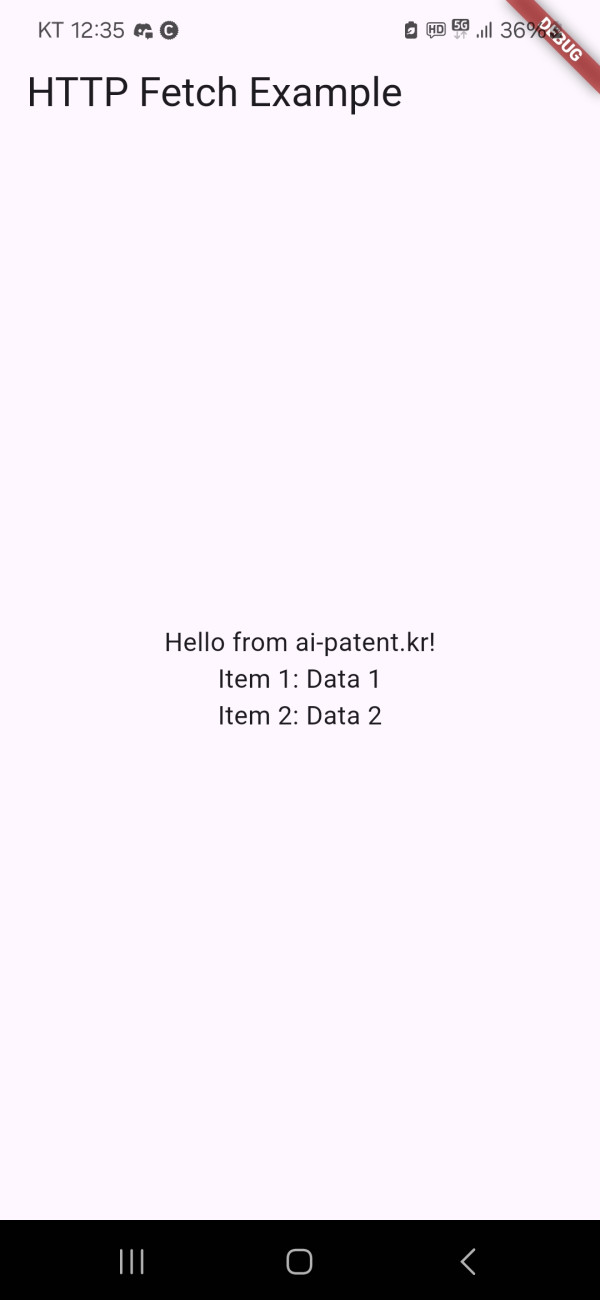
준비
1. main.dart ( Flutter )
2. data.php ( php )
1. Flutter 설정
pubspec.yaml
dependencies:
flutter:
sdk: flutter
http: ^0.13.5 # 최신 버전의 http 패키지를 추가
# The following adds the Cupertino Icons font to your application.
# Use with the CupertinoIcons class for iOS style icons.
cupertino_icons: ^1.0.8
main.dart
import 'package:flutter/material.dart';
import 'package:http/http.dart' as http;
import 'dart:convert'; // JSON 데이터를 파싱하기 위해 필요
void main() {
runApp(MyApp());
}
class MyApp extends StatelessWidget {
@override
Widget build(BuildContext context) {
return MaterialApp(
title: 'Flutter HTTP Example',
theme: ThemeData(
primarySwatch: Colors.blue,
),
home: MyHomePage(),
);
}
}
class MyHomePage extends StatefulWidget {
@override
_MyHomePageState createState() => _MyHomePageState();
}
class _MyHomePageState extends State<MyHomePage> {
String _message = 'Loading...';
Map<String, dynamic>? _data;
@override
void initState() {
super.initState();
fetchData(); // 앱이 시작될 때 데이터 불러오기
}
Future<void> fetchData() async {
if (response.statusCode == 200) {
setState(() {
final jsonResponse = json.decode(response.body); // JSON 데이터 파싱
_message = jsonResponse['message'];
_data = jsonResponse['data'];
});
} else {
setState(() {
_message = 'Failed to load data';
});
}
}
@override
Widget build(BuildContext context) {
return Scaffold(
appBar: AppBar(
title: Text('HTTP Fetch Example'),
),
body: Center(
child: _data == null
? Text(_message) // 데이터 로드 전에는 메시지만 표시
: Column(
mainAxisAlignment: MainAxisAlignment.center,
children: [
Text(_message), // 서버에서 받은 메시지 표시
Text('Item 1: ${_data!['item1']}'), // item1 데이터 표시
Text('Item 2: ${_data!['item2']}'), // item2 데이터 표시
],
),
),
);
}
}
2. php 설정 ( 웹 서버 )
웹서버쪽 API 파일 : data.php
<?php
// CORS 설정 (필요한 경우)
header("Access-Control-Allow-Origin: *");
header("Content-Type: application/json; charset=UTF-8");
// 반환할 데이터 (배열 또는 데이터베이스에서 가져온 값)
$data = array(
"message" => "Hello from ai-patent.kr!",
"data" => array(
"item1" => "Data 1",
"item2" => "Data 2"
)
);
// 데이터를 JSON 형식으로 반환
echo json_encode($data);
?>
[root@ip-172-31-4-205 public_html]# pwd
/home/ai-php.kr/home/ai-patent.kr/public_html
[root@ip-172-31-4-205 public_html]# ll
total 8
-rw-r--r-- 1 root root 436 Oct 1 13:25 data.php
-rw-r--r-- 1 root root 20 Oct 1 13:20 index.php
[root@ip-172-31-4-205 public_html]# cat data.php
<?php
// CORS 설정 (필요한 경우)
header("Access-Control-Allow-Origin: *");
header("Content-Type: application/json; charset=UTF-8");
// 반환할 데이터 (배열 또는 데이터베이스에서 가져온 값)
$data = array(
"message" => "Hello from ai-patent.kr!",
"data" => array(
"item1" => "Data 1",
"item2" => "Data 2"
)
);
// 데이터를 JSON 형식으로 반환
echo json_encode($data);
?>


댓글목록0
댓글 포인트 안내