트위터 AI ( x.com )를 만들면서...

-
943회 연결
-
- 관련링크 : https://x.com/672회 연결
본문
트위터 AI ( x.com AI ) 를 위한 기본 설정
트위터 AI 글을 쓰게 된 동기
어제 어떤 분이 트위터 AI ( x.com AI )쪽을 물어와서 이쪽을 궁금해 하시는 분이 있을 것 같아 글을 남깁니다.
트위터는 이제 트윗을 수정하려고 해도 돈을 내어야 하는 상황이 되었다.
하지만 트윗의 데이터를 이용하여 AI 를 구축하시려는 분들도 많이 있을 것 같다.
시작이 반이라고 했는데, 시작을 하기에 어려움이 많아 간단한 글을 남깁니다.
소프트웨어로 처리된 트위터 글
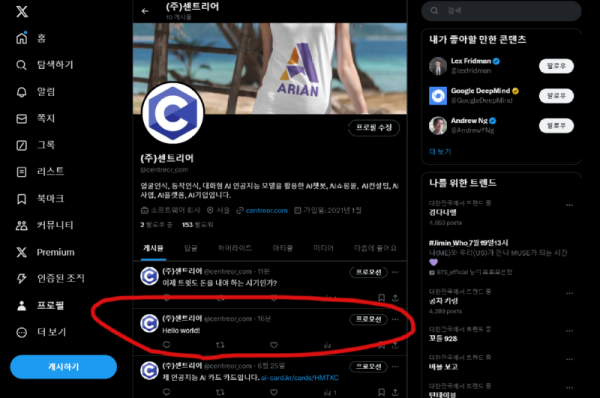
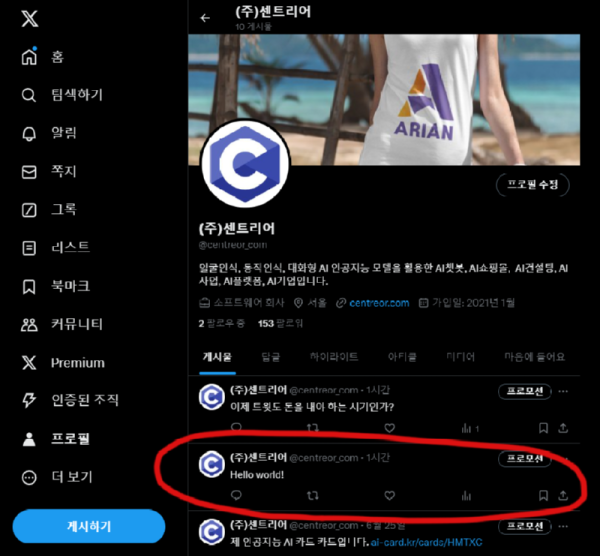
아래의 이미지는 프로그램 개발로 만들어진 글이다.
위의 이미지의 붉은 색 테두리 글이 프로그램을 이용하여 구현된 것이다.
이제 이것을 구현하는 방법을 알아보자
X Developer Potal
이제 프로그램을 개발하고 X ( 트위터 )와 연동하기 위한 정보를 받기 위해 아래 사이트로 접속하자
https://developer.x.com/en/portal/dashboard
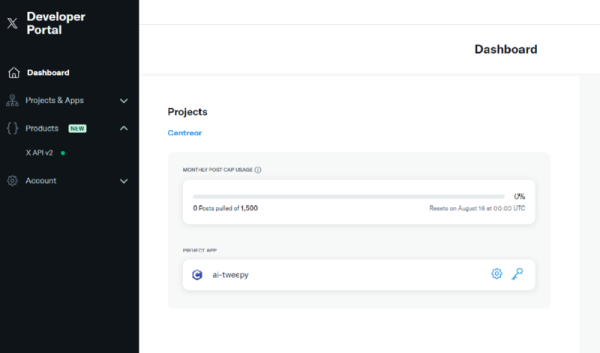
여기에서 Project 를 만들면 아래와 같은 형태로 만들어진다
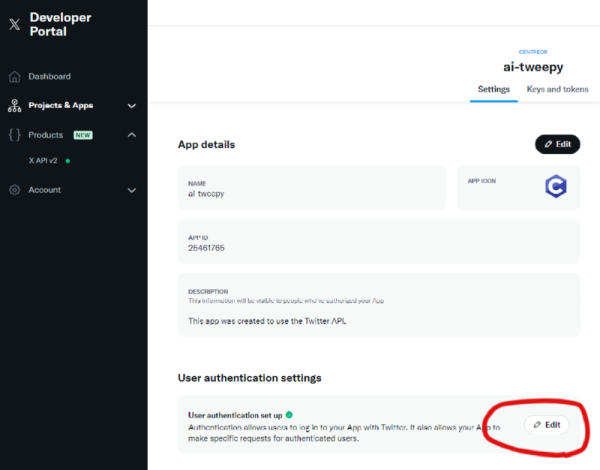
이제 만들어진 Project APP 를 확인하고 앱 설정 ( App Settings ) 를 클릭한다.
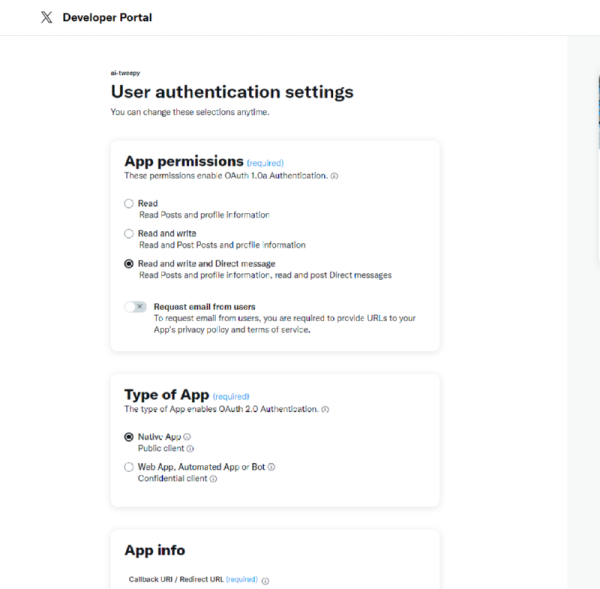
Edit 를 눌러 아래처럼 세팅한다.
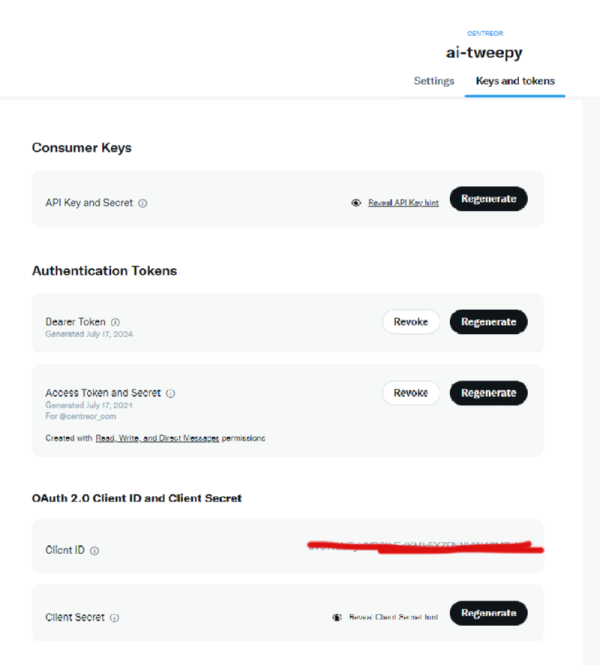
저장한 후 앞 페이지로 돌아가서 Keys and tokens 을 클릭한다.
이제 여기서 만들어지는 Key 를 이용하여 소프트웨어를 개발한다
이제 연동할 수 있는 키값은 만들어졌다.
트위터 ( X.com ) 연동 소프트웨어 개발
아래는 트위터 글쓰기 소프트웨어 소스 코드이다.
from requests_oauthlib import OAuth1Session
import os
import json
# In your terminal please set your environment variables by running the following lines of code.
# export 'CONSUMER_KEY'='<your_consumer_key>'
# export 'CONSUMER_SECRET'='<your_consumer_secret>'
# Linux
# export CONSUMER_KEY=z32UvwAkfWhO4QZ4h5rXdBOZ3
# export CONSUMER_SECRET=nK435taT3IUzGvrr34kPMz6fgd3paRM03452cYX66QVPQlLqanORfz
# Windows
# set CONSUMER_KEY=zj5cUvTE3QZ4354h5rXdBOZ3
# set CONSUMER_SECRET=nK7wJKtaT345GvewetMz6fAEd3453paRM02cYX66QVPQlL4qanORfz
# API KEY : zj5cUvw34AkfWdafdah3455rXd
# API KEY SECRET : nK7wJKtaT3dafdTaekP6345fgd3paRM02cYX66QVanORfz
consumer_key = os.environ.get("CONSUMER_KEY")
consumer_secret = os.environ.get("CONSUMER_SECRET")
# Be sure to add replace the text of the with the text you wish to Tweet. You can also add parameters to post polls, quote Tweets, Tweet with reply settings, and Tweet to Super Followers in addition to other features.
payload = {"text": "Hello world!"}
# Get request token
request_token_url = "https://api.twitter.com/oauth/request_token?oauth_callback=oob&x_auth_access_type=write"
oauth = OAuth1Session(consumer_key, client_secret=consumer_secret)
try:
fetch_response = oauth.fetch_request_token(request_token_url)
except ValueError:
print(
"There may have been an issue with the consumer_key or consumer_secret you entered."
)
resource_owner_key = fetch_response.get("oauth_token")
resource_owner_secret = fetch_response.get("oauth_token_secret")
print("Got OAuth token: %s" % resource_owner_key)
# Get authorization
base_authorization_url = "https://api.twitter.com/oauth/authorize"
authorization_url = oauth.authorization_url(base_authorization_url)
print("Please go here and authorize: %s" % authorization_url)
verifier = input("Paste the PIN here: ")
# Get the access token
access_token_url = "https://api.twitter.com/oauth/access_token"
oauth = OAuth1Session(
consumer_key,
client_secret=consumer_secret,
resource_owner_key=resource_owner_key,
resource_owner_secret=resource_owner_secret,
verifier=verifier,
)
oauth_tokens = oauth.fetch_access_token(access_token_url)
access_token = oauth_tokens["oauth_token"]
access_token_secret = oauth_tokens["oauth_token_secret"]
# Make the request
oauth = OAuth1Session(
consumer_key,
client_secret=consumer_secret,
resource_owner_key=access_token,
resource_owner_secret=access_token_secret,
)
# Making the request
response = oauth.post(
"https://api.twitter.com/2/tweets",
json=payload,
)
if response.status_code != 201:
raise Exception(
"Request returned an error: {} {}".format(response.status_code, response.text)
)
print("Response code: {}".format(response.status_code))
# Saving the response as JSON
json_response = response.json()
print(json.dumps(json_response, indent=4, sort_keys=True))
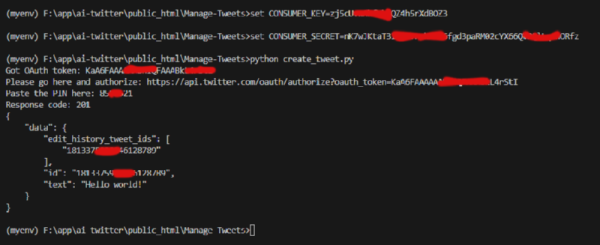
위 의 소스코드를 참조로 이제 결과를 확인해 보자
실행시 토큰 링크가 나오는데 이 링크를 열면 PIN 번호가 나온다.
이것을 넣어주면 연동하여 아래 처럼 실행된다.
한번 연습해 보세요
이 후 AI 부분은 조금 시간이 나는데로 다시 업데이트 하겠습니다.


댓글목록0
댓글 포인트 안내